The Ultimate Guide to Restoring Damaged Vinyl Record Sleeves

Ever brought a vinyl record to find your sleeve only in tats? If you are a record collector, you have probably experienced this heartbeat – to open a box of old records or to get out a favorite album, only to find your sleeve up, stained, or perverted beyond recognition.
This is a moment to stop a heart, isn’t it? The music is still, but a damaged sleeve takes away from the magic – history, and this correct visual experience that makes vinyl so great. But there is no fear. A ruin sleeve is not essentially irreplaceable. No matter what the issue is-there are ways to bring back the album sleeves in the coming years for the issue of water, tears, molds, or sun-faces.
This guide is for you, vinyl enthusiasts that not only want to restore sound, but also have an overall experience of an album.
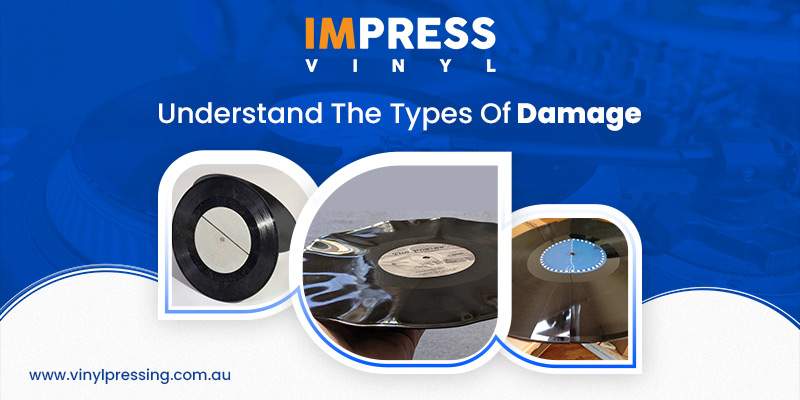
Understand The Types Of Damage
Before delaying the restoration process, it is necessary to understand the damage.

-
Tears, Rips, and Seam Splits
Cause: With time, repeated handling, pressure, or incorrect storage, the seams may split or cover tears. This is particularly prevalent with gatefold albums where stress is centralized along the spine.
-
Warping due to Water Damage
Cause: Moisture exposure, whether by spills, humidity, or flood, can result in warped sleeves, wavy textures, or glued-together layers.
-
Mold and Mildew
Cause: Storing records in humid or unventilated locations can cause mold to grow. Not only will this damage the sleeve, but it can impart a musty odor that will not go away.
-
Stains, Dirt, and Sticker Residue
Cause: Stickers, tape, fingerprints, and coffee (or perhaps beer?) spills over the years can leave imprints that detract from the sleeve’s brand-new appearance.
-
Fading and Color Damage
Cause: Exposure to sunlight and time can fade artwork or cause it to yellow, leaving your once-colorful cover looking flat and lifeless.
Step-by-Step Restoration Guide
-
Mending Tears and Seam Rips
If your sleeve has small tears or split seams, don’t fret—this is one of the simplest problems to repair.
Materials Needed:- Acid-free archival glue or tape
- A heavy, flat object (such as a book)
- A small paintbrush (for applying glue)
How to Repair It:
- For small tears: Apply archival tape (never regular tape—it turns yellow with age) on the inside of the cover for an invisible mend.
- For seam splits: If the seam split, apply a thin coat of archival glue to the split and squeeze the two pieces back together.
- Weight it down: Set a heavy book on the fixed area for several hours to strengthen the repair.
For a nearly invisible repair, use glue rather than tape and allow it to dry totally before touching.
-
Restoring Water-Damaged and Warped Sleeves
Water damage is finicky, but with a little patience, you can reduce its effects.
Materials Needed:- Wax paper
- Heavy books
- A well-ventilated, dry place
How to Repair It:
- Unstick stuck pages: If the pages or the sleeve components are stuck, separate them slowly with a butter knife or flat plastic card.
- Dry the sleeve: Put it between two pieces of wax paper and press under heavy books for 24-48 hours.
- Flatten warping: If the sleeve remains wavy, put it under heavier weight for an extended duration.
Do not use direct heat, such as hair dryers, since it will aggravate the damage.
-
Removing Mold and Mildew
If your sleeve has grown mold, act fast to avoid further destruction.
Materials Needed:- A soft cloth
- Isopropyl alcohol (70%)
- Cotton swabs
How to Repair It:
- Wipe off surface mold: Remove loose mold spores with a dry, soft cloth.
- Disinfect the sleeve: Gently dampen a cloth with isopropyl alcohol and clean the affected areas gently. Don’t soak the paper.
- Let it air out: Position the sleeve in a well-ventilated spot for a day to allow complete drying.
Store your records with silica gel packets to avoid future moisture accumulation.
-
Cleaning Stains and Sticker Residue
Old price stickers, tape marks, or coffee stains? They can be annoying, but they’re fixable!
Materials Needed:- Goo Gone or rubbing alcohol
- A cotton ball or Q-tip
- A microfiber cloth
How to Repair It:
- For stickers: Apply a few drops of Goo Gone to a cotton swab and gently rub the sticker until it peels away.
- For stains: Lightly dab the stained area with a cloth soaked in rubbing alcohol. Be careful not to oversaturate.
- Dry and buff: Use a clean microfiber cloth to wipe away any residue.
Always test a small, hidden area before applying any liquid cleaner to ensure it won’t fade the artwork.
-
Reviving Faded Covers
If your record cover has faded colors, you can try to revive some of its original appeal.
Materials Needed:- Soft eraser
- Cotton cloth
- Color pencils (for touch-ups)
How to Repair It:
- Remove dirt buildup: Rub a soft eraser over faded spots gently to erase grime without distorting the ink.
- Buff with a dry cloth: A cotton cloth that has been cleaned may be able to brighten colors simply by erasing surface dust.
- Touch up artwork: If you’re feeling bold, lightly shade in faded areas using colored pencils that match the original design.
Never use markers or ink pens—these can bleed and ruin the artwork further.
Preserve Your Vinyl Legacy
Reconditioning your vinyl sleeves is not only a fix, it’s saving history, retaining the entire vinyl experience, and honoring the artwork that went into these stunning album covers.
Now that you have learned how to repair tears, blemishes, and combat mold, your album collection can remain in mint condition for years to come. So the next time you come across a worn-out sleeve in your collection, don’t discard it—restore it!
Looking to give your vinyl collection the care it deserves? Impress Vinyl offers expert solutions to keep your records and sleeves in top shape. From high-quality outer sleeves to custom packaging, we help preserve the magic of vinyl.